Friday, March 20, 2015

Easier than HTML

This post was originally written in April of 2009,  but I'm resurrecting it now to share some improvements I've made on the original process.  Changes are at the bottom of the recipe.  Enjoy!!! (and yogurt is STILL easier than HTML!)

So, I just spent the past 3 hours widening the columns of my blog. I'm so inept. There are two basic problems here:

  1. I'm a perfectionist and when things are out-of-balance, it really bugs me. Little dotted lines in the wrong place bug me. Uneven margins bug me. My daughter Sarah would say, "Get over it, Mom."
  2. The only computer class I ever had was in highschool. Mrs. Sharp's geek study hall where Joey and Scott and Jeff (the REAL computer whizes) would dink on the computers and I would hover around and watch. That's back when Appleworks was the thing. oooOOOooo
So, what I've learned while blogging I've learned by trial and error, and error, and error. It takes time to make all those mistakes!
Well, at least I haven't accidentally erased my entire blog...yet.
Well, on to the subject at hand -- not everything in life is as difficult as HTML. Thank you, Lord!!!
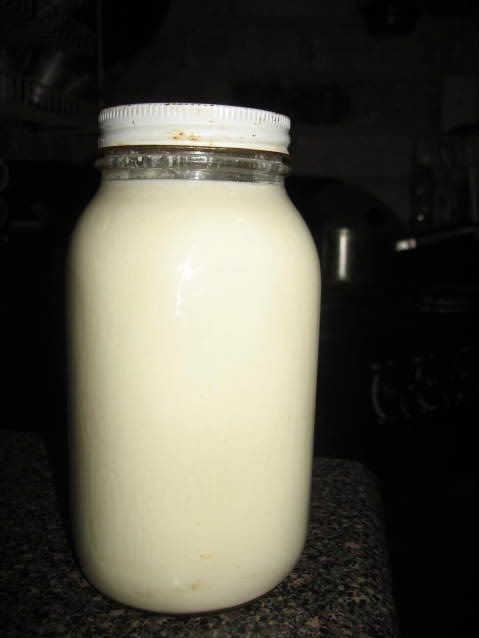
Take yogurt, for instance. I really like everything about yogurt...except the price. Here, a liter of yogurt (basically a quart) costs right about $2. That's if I buy it by the quart and not in individual containers. Those little "yogurt cups" you buy in the store cost about $.60 each. Multiply that by 8 and you get a family which doesn't each much yogurt. Until I learned to make it myself.
I never dreamed making yogurt would be so easy!
What you need:
  • 1/2 cup plain yogurt
  • 7 cups milk (any variety -- I've used fresh from the cow, fresh from the goat, fresh from the grocery store and shelf-stable boxes of "Nutri-Leche" which is only part milk and not at all fresh. The recipe I used actually called for dry milk and a can of evaporated milk.)
  • 2 clean quart jars with lids
  • a thermometer -- I use a meat thermometer
  • An Igloo Little playmate cooler or another small cooler which will fit two quart jars standing up.
If using raw milk, bring the milk up to 190 degrees (scald it) and then let it cool to 110-120. Otherwise, simply bring the milk to 110-120 degrees. More than 120 will kill the yogurt cultures and your milk will curdle.
While the milk is cooling, sterilize your jars and lids. You can do this by putting them in a pan of boiling water for a few moments or you may fill them half-way with water and put them in the micro on high until the water boils. Careful! The jars will be hot. You can say, "Duh" if you want to, but I need to be reminded of things like that.
When milk is at the desired temperature, pull out 1 cup of milk and combine that cup with the 1/2 cup plain yogurt. Mix well.
Return the yogurt mix to the pan of warm milk. Mix well with a wire whisk (or just use a spoon).
Pour mixture into the sterilized jars and put lids on snugly, but not too tight.
You're basically done. Put the jars in your cooler, and fill the cooler with water that is at least 110 but not more than 120 degrees. I aim for about 118.
Set your cooler in a corner where it won't be disturbed and cover it with a heavy towel. Set your timer for 3 hours and go do something else. Don't disturb the yogurt while it is setting.
After 3 hours, check your water temperature. If it's still within the range of 110 and 120, re-cover and forget it for another hour. If it's cooled down, add warm water to raise the temp back up. Check it every hour until it "sets" (anywhere from 6 to 8 hours).
Put it in the fridge to chill.
Before you taste it remember that this yogurt is plain and unsweetened. You can sweeten it with fresh, frozen or canned fruit, sugar, honey, whatever your preference. If your family is accustomed to the super-sweet, store bought yogurt, you'll need to add quite a bit of sugar to make it acceptable (start with 1/2 cup sugar to two quarts of yogurt). That's OK! It will still be cheaper and healthier than what you buy at the store. You can reduce the sugar a little bit each time you make it and your kids really won't notice. When you make "additions" to your yogurt, don't beat it. Just fold the additions in, otherwise you'll lose consistency.
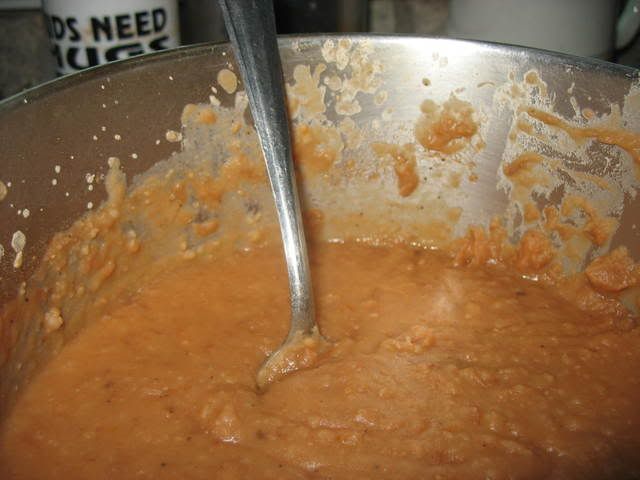
The finished product probably will not be as thick as what you purchase in the supermarket. Most store-bought yogurts also contain gelatin to make it thicker. To thicken, dissolve 1Tbsp. gelatin in 1/4 cup hot water. Cool to 120 degrees and stir into 1 quart yogurt. Chill.
Personally, if it doesn't set up, we just drink it! ;^)
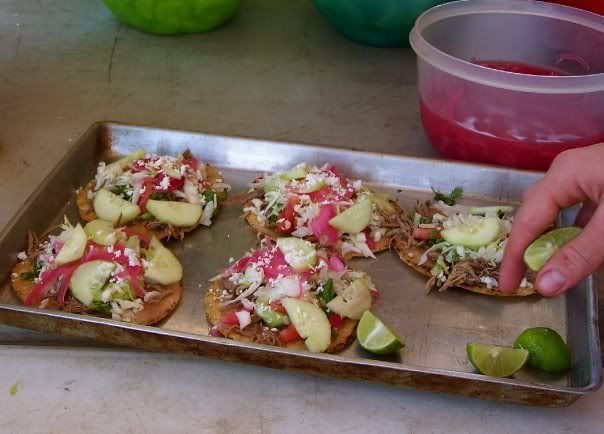
I've used this as yogurt, frozen it in the ice cream freezer, added it to milk shakes, put it over pancakes, and used it in place of sour cream on tacos. Very versatile food!
I don't know what you pay for milk, but the time I had to buy "boxed milk", this yogurt cost about $1 per quart. Isn't that about the same cost as milk? It is here. Those of us with access to goats or cows will pay about $.25 per quart. That's a cheap snack!

Editor's addition to this post, March 20, 2015:
***So, here I am 6 years later and still making yogurt with basically the same recipe.  HOWEVER, I've made a couple of changes that those of you who really want to MAKE. YOGURT. will appreciate...
#1:  I use a large ice chest and make the yogurt in gallon containers.
#2:  I let the yogurt set for 24 hours instead of only 3.

  • So, bring your milk up to 190 and hold for 30 seconds. 
  • While it is cooling to 120 (because over 120 will kill yogurt cultures), sterilize your jars and lids and fill your ice chest with a few inches of 120 degree water.
  • When your milk has reached 120, mix in 1/2 cup active yogurt cultures for each gallon of milk.
  • Pour warm milk into sterilized and COOLED jars, (remember that magic number 120) and snugly lid them.
  • Place your warm jars of pre-yogurt into your 115-120 degree ice chest.  Put the lid on the ice chest and stick it someplace where it won't get opened, bumped, moved or knocked over for 24 hours.
I usually start this process about 8am, and have 2 gallons of yogurt in the cooler by lunch time.  The next morning when I get up, I pull out the gallon jugs of yogurt and sweeten or strain to make Greek yogurt or...whatever.

The best part about this process is the non-fussiness of it.  I really don't have time to watch the yogurt set and guard its temperature, so leaving it in the ice chest overnight was a great discovery for me! If for some reason, it's too runny in the morning, just lid the chest again and check it in a few hours, but I think you'll agree that this process is a real winner!

Let me know how this works for you!! Do you have another easy method? How does your family like to eat yogurt?

Thursday, September 24, 2009

Loss Leaders and Budget Breakers

Shopping here in Mexico is a bit different than in the States. I'd never seen a market like this one in Culiacan, Sinaloa, prior to moving down here. The sights, the sounds, and the smells are, well, memorable!

One thing I really miss, though, are the weekly grocery ads. I used to love the coupons I could clip to get a $.25 gallon of milk with a $25 purchase or frozen juice concentrate at $.10 each (limit 10, of course). The stores here don’t have coupons, but I still manage to find great deals sometimes. The question comes up then, when is it really a good deal and when is it just causing me to overspend?

Loss leaders are those items the grocery store has put on the front of their advertisement page to lure you into the store. That 25 cent gallon of milk, for instance, is bringing you into the store not so that you will get a good deal on milk, but rather so that you will spend that $25 in their store. They know that most people who come in to the store to redeem that coupon will spend well over $25. If there’s an Oreo display right next to the milk, they’ll recoup their loss on the milk that much faster.

Budget breakers are basically any items which are not on your list. More specifically, though, budget breakers are generally not necessary – no matter how cheap they are. Potato chips, for example, are budget breakers. I’ve tried to explain that to my husband for years, and he’s beginning to understand…finally! Even when Pringles are on sale for $.99 and you’ll save $5 on 5 cans, I can still save you more by simply not buying any.

So, when does a loss-leader become a budget breaker? Generally, if it’s something that you would not buy if it wasn’t on sale, you ought to skip it. If the sale price still leaves the item more expensive than its generic equivalent, skip it. If there’s a way to make the item at home or to make a reasonable substitute for cheaper, skip it.

What’s the best “loss leader” bargain you’ve seen lately? What are some inexpensive snack foods you’ve found to replace the way-too-expensive-and-unhealthy potato chip?

Thursday, June 11, 2009

Using those left-over tortillas

One thing I've found to be extremely different, food-wise, in Mexico are the tortillas. You just can't beat a tortilla fresh off the griddle! When I make them here, the kids usually snag the first half-dozen as they come out and eat them either plain or with a little butter on them. Yummy!

The second day, though, corn tortillas here start to taste like the ones we used to buy in the States: pretty dry and prone to crack when you fold or roll them. If not used by the end of the second day, fresh corn tortillas are only good for pig food. Looking pretty sad!

So, since we don't have a pig, and I don't like to throw away good food, I've found a few ways to use tortillas which aren't as fresh as I'd like.

Now, I know that corn tortillas aren't as popular in the US as they are here. Nowhere near!!! There is no food in the States which compares to the popularity of tortillas here. It's almost like bread and butter in the midwest, but moreso because tortillas are served with every meal here. That leaves the potential for a whole lot of left-over tortillas!!!

One nice thing, though, is that large packages of corn tortillas are pretty cheap in the States and using these left-over ideas, you can make some quick-fix meals to throw in your freezer for a fraction of what you'd pay for the same pre-prepared food.

When you find corn tortillas on sale, or if the ones you bought fresh are seeming a little sad and tired, just throw them into your freezer in a plastic bag to save until you're ready to use them.

Here are some tortilla ideas. Click the link to go to the individual recipe (links will be added poco a poco!):

Quesadillas (pronounced kay-sah-DEE-ahs)

Tostadas

Taquitos (pronounced tah-KEE-toes)

Enchilada Casserole

Creole Casserole

Do you have a favorite use for corn tortillas? I'd love to hear it! I'm always looking for another recipe. Variety is a good thing!

Home-made laundry soap

Face it, our biggest grocery expenses are often NOT things we eat! Diapers, baby wipes, cleaning supplies, pet food, etc., all take big chunks out of our food budget (assuming, first of all that you have a food budget and second of all that you include non-food items as part of your monthly "grocery" expenses).

I've found a way to reduce my laundry costs to only a few cents per load...easily!!! In the States, I often made my own laundry soap using a recipe similar to this one from the Simple Dollar. As the writer of that recipe says, you'll reduce your laundry bill from $.30-$.40 per load to $.03-$.04 per load. Score!!!

I ran into a problem when we moved here. I couldn't find the necessary ingredients. Bar soap -- yes, no problem. Lots of that. Borax and washing soda??? No lo hay! (There ain't none!)

So I started experimenting and looking at what the nationals use. When we visit the States next time, I plan to check and see if this soap is available. I'll bet it is, if you know where to look!

Lirio.

At a cost of 8 pesos a bar (around 50 cents), you just can't beat this stuff. The ladies of the village here just use the bar as-is. Most of them don't have washing machines, so they just rub the soap on the clothes and scrub the clothes clean. I'm lazy. I have a washing machine. It usually works.

So, instead of rubbing the soap on the clothes, we experimented with some pre-made mixes.

Evie and a little friend, Ian, grated a bar of Lirio soap and I added some powdered oxygen boost stuff I found (NOTE: DON'T add water to Oxy-stuff. It foams uncontrolably!!!) and made a dry soap mix which could be easily added to the washer.

I had issues with the stuff not completely dissolving, though, so we continued to experiment.

Now, I think we have it perfected...

One bar of soap (grated)+ One gallon of water (mix well) = One bottle of laundry soap

I use about 1/2 cup of soap to a large load of laundry, so my cost is just under $.02 per load. Compare to a gallon of laundry detergent here (which I can't find for less than $10) and doing a load a day (which is low for our house!), I save $9 per month. I love saving money!!!

We find that we have to agitate the bottle a bit as it gets close to the bottom, because the soap wants to re-solidify. The washing soda and the borax in Simple Dollar's recipe will solve that problem.

Hey, if you find Lirio in the States, check the price and let me know! It will save me the search in August!

Tostadas

Summer time is a great time for get-togethers and youth hang-outs. Actually, I've found that youth like to get together and hang out pretty much all year long. And if youth are hanging out, they want to eat. Here's a great way to feed a large group on a small budget...and use up the leftovers you have lying around, as well!

The most expensive foods are convenience foods. Of course you know that if you've ever walked down the "Ready-to-Eat" aisle of the grocery store. Tortilla chips are cheaper than potato chips, but they can still be kind of spendy. Home-made tostadas and tortilla chips are easy and are about half the price of store-bought.

You'll need:

  • a package of corn tortillas, fresh or frozen.If frozen, try to knock all the ice off of them, as the ice crystals will cause the hot oil to jump up at you. Painful.
  • a rack or a collander to put the cooked tortillas into, in order to let the excess oil drip off
  • tongs to retreive your tostadas from the hot oil
  • a heavy skillet or deep-fryer
  • about a liter of oil, but possibly less, depending on how many tostadas you're making
  • salt

Pull your old tortillas out of the freezer and wrap them in a fuzz-free towel to thaw.

Day Old Tortillas

They may look a little ugly when you start, but that's ok!

Not pretty.

Heat about 1/4 to 1/2 inch of oil (or shortening) in your skillet to very hot, but not smoking. You can deep fry them in a fryer, too, but I don't have one...plus, that uses more oil. ;^)

Gently slide the tortilla into the hot oil. Use your tongs to flip the tortilla. The longer they cook, the crispier they'll be. The ideal ones are lightly browned on both sides without turning black on the edges. Add more oil to the skillet as needed.

Under-done tostadas still taste fine, but are a little difficult to eat, since they stay chewy!
Fry in oil turning to lightly brown on both sides

Here are tostadas on a cooling rack and a cute little red-headed kid trying to snag one before lunch. Caught ya!

Place on rack or in collander over a plate to drip and cool

Add a little salt at this point, if desired. Perfect! Tostadas ready for topping or dipping! Would you rather have tortilla chips? Before frying, use a pizza cutter to cut the tortillas into triangles. Add salt before the tortillas are cooled so that the salt will stick.
Tostadas!

At this point, you decide how you'll use your tostada chips. They can be served with seviche (that's a very Sinaloan dish which you can read about over at Sarah's blog) or fresh salsa or topped with any of the following:

Red rice Refried Beans shredded cabbage or lettuce

  • Refried beans
  • Rice -- red, white or whatever you have on hand
  • Shredded meat
  • Shredded cabbage or lettuce
  • Radish or cucumber slices
  • Chopped tomatoes
  • Sauteed onions
  • Sour cream or plain yogurt

Serve with lime wedges and picante sauce. Voila! Supper is served!!!

Tostadas preparadas

Cheapskate note: Don't throw away that used oil left-over in your skillet! It's only been used once and is still perfectly good to use in frying eggs, sauteeing onions or meat or just about anything else. It will have a slightly "corny" taste, but why waste it??? Let the oil cool completely and then use a funnel to pour the oil back into an empty oil bottle. Be sure to write "USED" on the side!